 |
| Manufacturers |
| Me List |
| Me 262 Variants |
| Me P.1104 |
| Me P.1106 |
| Me P.1109 |
| Me P.1110 |
| Me P.1111 |
| Me P.1112 |
| Me P.1114 |
| Me Schwalbe |
| Me Zerstrorer PII |
| Home |
PLANET MODELS 1/72
William Moore
This kit is fairly similar to the one below differing only in the arrangement of the jet intakes being more conventional and hence looking more like a real jet from the '50's.
PLANET MODELS 1/72
William Moore
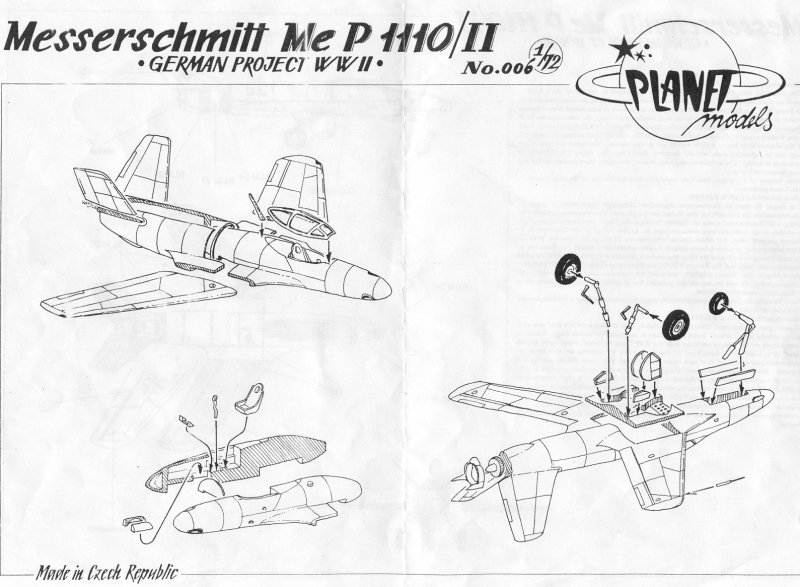
The Me P1110/11 was a low wing fairly narrow fuselaged jet
design .
It's major distinguishing
characteristics were it's V- tail ( butterfly ) and it's most bizarre
feature was a jet engine mounted
at the tail with an intake above the wing . This is not strange except
the intake circled the whole
body which was slightly pinched in to increase the area of the intake .
This was a contender in the
Emergency fighter program but was abandoned as too complicated . For
those 1946 Luftwaffe
enthusiasts like myself there is only 1 kit available which is from
Planet Models. One note of
caution I got my kit for about $26 U.S. here in Australia and I
understand a certain large mail
order company over there is charging a bit more , I can suggest NKR
Models in Australia as a
cheaper source ( see the Links page ).
This was only my third resin kit but was quite easy , whilst
not
quite Czechmaster quality it's not
difficult taking only three stages . I suggest starting with the front
of the body which is two pieces
, simple details are provided for the cockpit but more detailing could
be done if you're keen . Me ,
I just slapped the seat , joystick etc. in and threw on some RLM 66 (
Xtracolor ) . Before this drill
out the nose gently and put in some lead weight to avoid a tail sitter
. When you put in the nose
wheel bay you will need to trim these to fit and jiggle these to sit at
the right angle to the rest of
the bay , do this after assembling the nose as I didn't and had to do a
little trimming and filling ,
my mistake ! Next assemble the rear fuselage and here comes the tricky
bit . Paint both the rear
and front halves around where they join with black to avoid seeing
yellow resin when you look at
the engine later . The intake had a splitter plate which must be placed
between the front and rear
halves when joining these , practice dry fitting this a lot if you have
fumble fingers like mine . The
diagram for painting clearly shows where it should be but it is a pain
to do. I have noticed one
review of this where the person has either poked it in too far or
thrown it away in disgust , both
are easy to do.
All that's left now is to add the wings and tailplanes and the
undercarriage . Take a little care with
the U/c bay as you can place it backwards . At this stage get out your
favourite filler for resin (
Milliput for me ) and fill the fuselage joints which inevitably won't
be perfect as well as a few air
bubbles . Take care around the top MG trough as it tends to fill up
when doing this and may need
to be deepened .
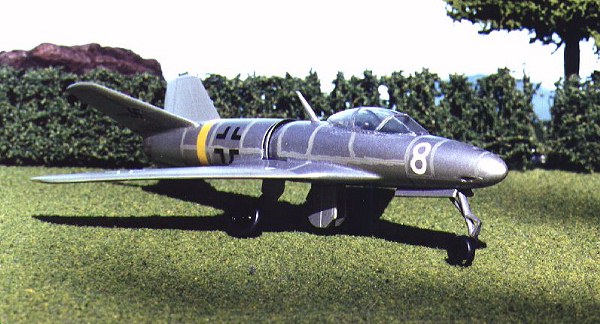
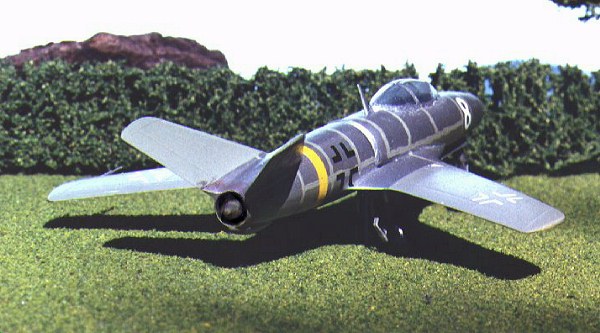
Painting : - Pick a scheme , any scheme . With 1946 Luftwaffe
I
usually get out a decal sheet for
a late war plane of similar type ( 1945 Kommando Nowotny Me 262 ) and
follow that scheme and
use the decals , as this kit includes decals ( a first in resin kits )
you can simply follow their advice
. After painting simply add the U/C making sure to trim the oleo
projections for fitting the tyres
on as these are far too long and the wheels would fall off if this far
out.
Rating : - 8/10 Ok there were a few things to fix but nothing beyond the average modeller and the kit really looks the part made up . Buy one , Completed 25/9/96.
I finished this about 30/9/96
This is also another early Planet kit now out of production.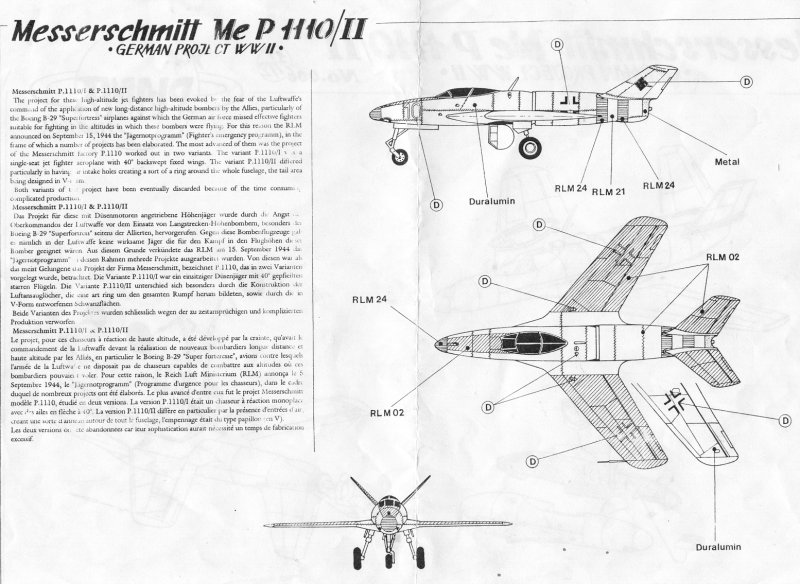 |
 |
 |