 |
| Manufacturers |
| Ar E 381 |
| Ar E 555 |
| Ar E 580 |
| Ar E 581 |
| Ar E 583 |
| Ar Project II |
| Ar TEW 16 |
| Home |
ARBA 1/72 & 1/48 AUD $ 20 - 25 (1/72)
William Moore - Reviewed 97
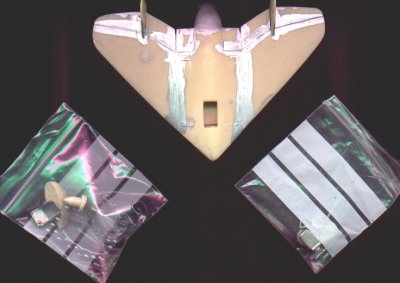
There is not many parts to this one . You first start with the body which has two main parts one being the body of the engine area and add the jet intakes . Then grab your favourite filler , if you're down to the last 1/3 or less go out and purchase some more before starting , you'll need it . After a ton of sanding and filling this started to look quite good . Next add the wing section and fill and sand again and again and again etc. etc.
Well after all that I'm stuck on this kit , I will return to it later but have run out of enthusiasm for the moment. 12/1/97
Rating : - 1/10 Definitely only for the enthusiast , yes it'll round out your collection but only if you reaaaallllyy want it , consider the above before buying . Even the example photo on the cover looks fairly average which doesn't inspire me .
Here's where I got up to - the silver paint was for picking up the many problems with the seams.
|
In the end I passed this to a friend who wanted it desperately and there it's fate remains .
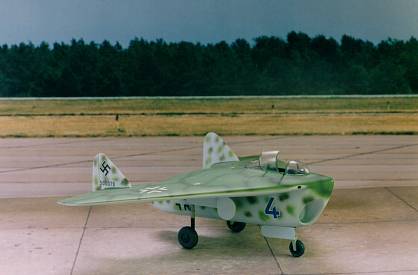
Dan Johnson advises me that their 1/48 kit of this is quite good and given the improvement evident in their 1/48 Triebflugel I would buy that version. Here's a picture of his built up version .
ARBA 1/48
Mark Hernandez
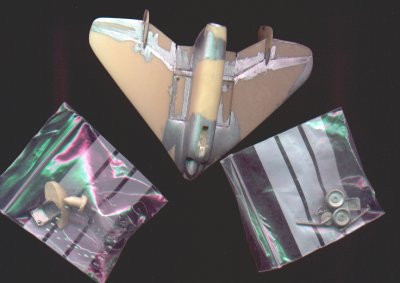
Dan's right on the 581, it is really a nice kit. It's only 5 main parts; body and wings are one piece, intake nose piece, engine pod which also comprises the cockpit tub and the outer fins on the wings. Yes, it has white metal gear and L/G doors and seat and a vac canopy.
I spent the time watching the Academy Awards cleaning up the
mould
lines and flash on the
leading and trailing edges. I also thinned out the trailing edges. The
left wing is slightly thicker
than the right wing. The engine pod to body is a beautiful fit. Just
need to clean up the mating
pieces on the front of the engine pod/body to the nose cap. I didn't
get a chance to cut off the
mold retainer on the inside of the upper body trailing edge. This is
where the back of the
body/wing joins the back of the engine pod/body.